Saturday, June 19, 2010

Stripping the Deck

I've been designing the deck and having fun getting it started. I'm using the darker cedar to match the last two strips of the hull, with two white strips and then a white kingplank down the middle. Then I'll continue with some medium cedar and fill in the middle in front and behind the cockpit with the white cedar.
Here is a view of the top of the front of the hull. The miters are challenging but rewarding.

Clamps, clamps and more clamps...and I still don't have enough. To quote my son Ben. "When building a boat you can never have enough clamps." Off to Home Depot for more. The 99 cent spring clamps are a bargan. One reason for all the clamps is that I'm stripping the deck without staples. So far this method has worked well since I do no more than one strip at a time on each side.

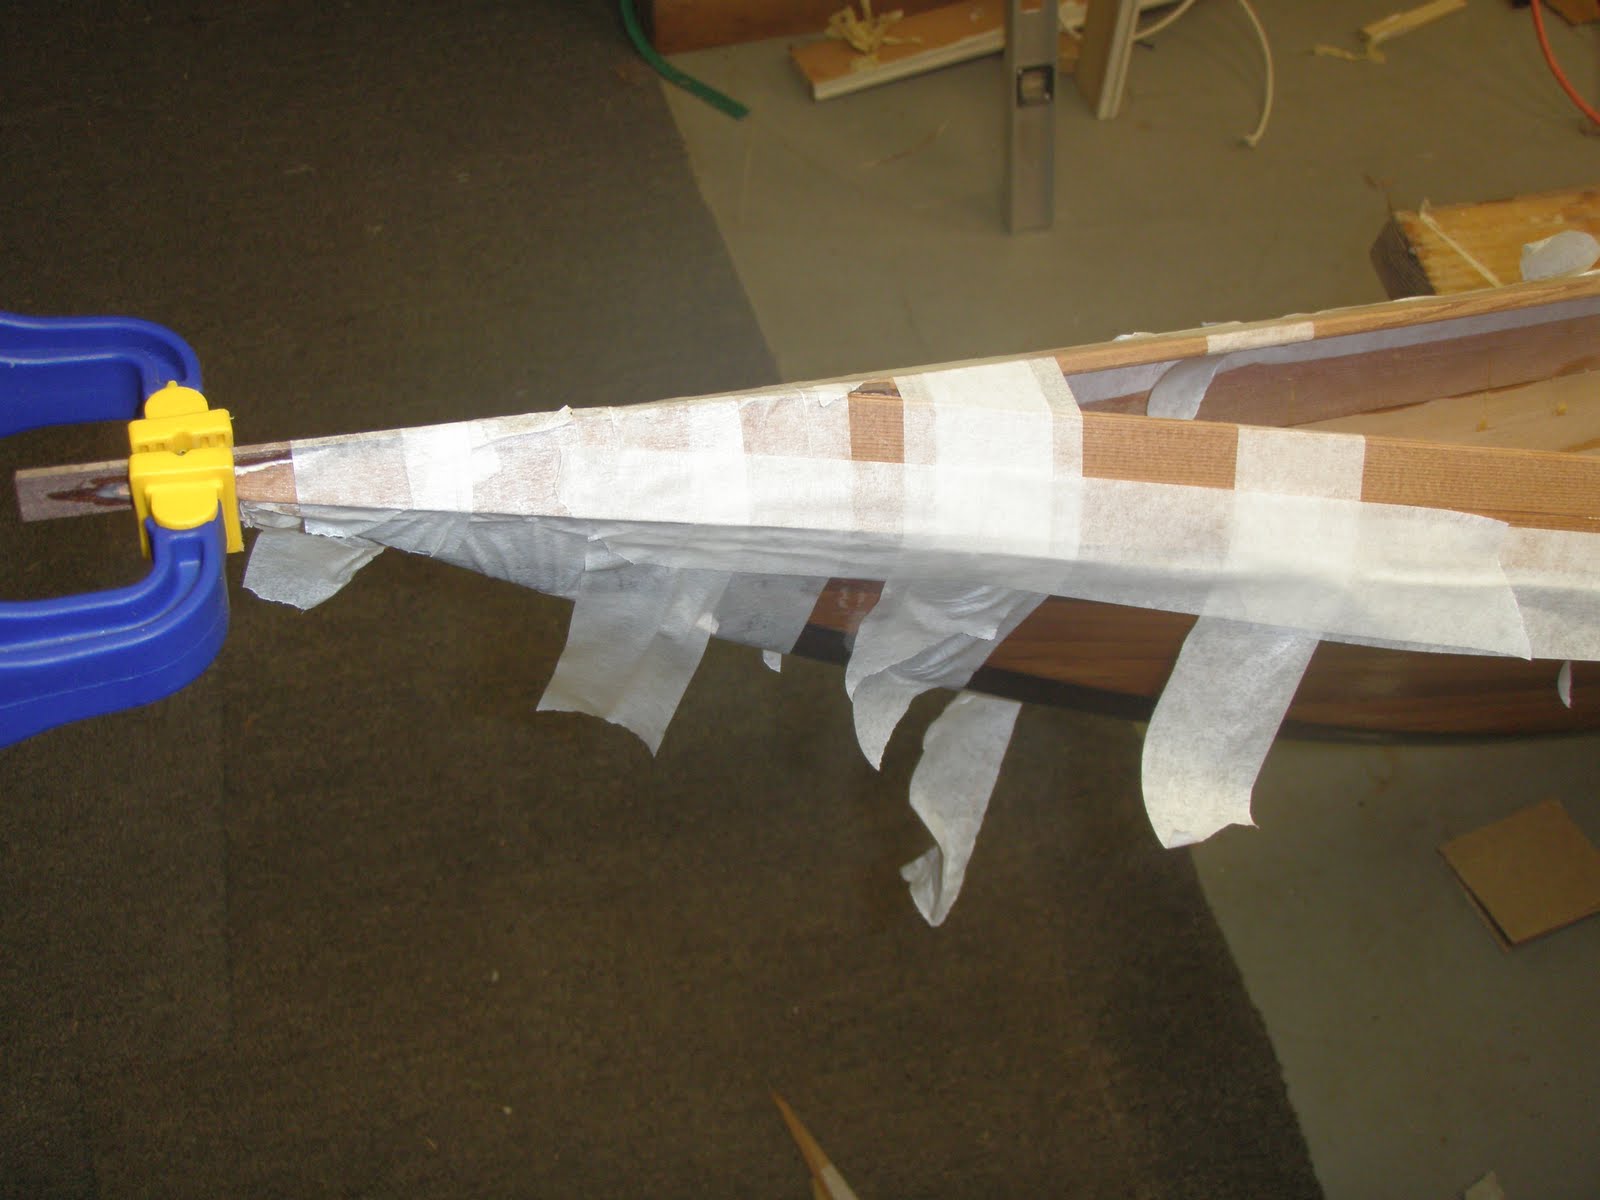
Clamping the front miter down tight. When I turn the deck over I'll seal that seam with some epoxy and silicia to make it very strong.

I staple a short strip above the strip to be installed and then clamp a piece over it as can be seen to keep it in place.
Another method that works well is using a piece of shim, lifted on one end, screwed in the middle so it forces down pressure on the piece just installed.
A Happy Father's Day to all!.

Monday, June 14, 2010

Setting the Deck Sheer Strips

Here are the first two strips mitered and attached to the stems. Masking tape worked real well to hold it all in place. I installed a thin strip of black walnut to carry the wood of the stems up to the deck and then transfer to the Alaskan White Cedar. We'll see how it all works out. For now I was pleased with the results of this beginning on the deck.
I'm planning to do the deck withouth staples to eliminate the holes, expecially in the beautiful Alaskian White Cedar that will be the centerpiece of the deck. I attached the sheer stip with one small brad and masking tape. I'm using two techniques so far for the next strips. First I'm using a small piece of strip that I staple above the strip to be attached and then clamp the whole thing together. Needed to make a run to Home Depot for more clamps. The other technique is below with using another piece of wood screwed to the station to hold the glued strip down. Both are working well so far supplemented by masking tape.


Today was my "sabbath day" so I figured it was a good day to work on my "sabbath" project. After getting the hull glasses and turned over I'm remotivated to continue to work. Even though its spring and the blues are running in the ocean and the trout in the river I was happy to spend a few hours in the basement. With Kebmo & Bruce Springsteen on the CD player it was a great afternoon.

Saturday, June 12, 2010

Ready for the Deck

Here the stations and the hull are sealed with masking tape ready to install the sheer strip and begin stripping the hull. You can see the stations that are flat on top are the place where the cockpit will be. Working on my deck design. I have shades of cedar to work with. Medium that the color of most of the hull. Dark that are the top two strips of the hull. And Alaskian White Cedar that I will use on the top deck.
Here the stations are reset with a few dabs of hot glue to keep them in place
Today I flipped the hull over to get ready to build the deck. Although all the stations were supposed to stay in as a result of extra wood glue holding them...they all decided to fall out.
This created an interesting surprise when we lifted the hull off the supports to remove the strongback. The whole thing sagged in the middle. My father thought it broke. I told him I was glad he was there so if it did I had someone else to blame. However,it was a good example of the flexability of the cedar & fiberglass. I'll want that kind of bend when I hit a rock in the river.

Friday, June 4, 2010

Glassing the Hull

Here is the completed hull with the cloth and first coat of epoxy. The whole process went much easier than I anticipated. In fact I have been putting it off because of my insecurity in doing it. Thanks to my son Ben and Joe from Redfish for you continued advise. Now for the 2nd coat to fill in the weave and then a final 3rd coat. I'll also add some extra cloth at the bow and stern stems. As you can see the cloth laid down nicely at the bow so I didn't even have to cut it.
At the stern we needed to cut the cloth. I'll trim it later. The extra cloth at the sheer strip helps catch the drips. I wet it out with a brush and then used a squeege to pull all the air and extra epoxy out.

Here's my friend Lou who helped me by mixing epoxy so I could keep wetting it out. It was great to have an extra set of hands. Thanks Lou.

We covered up and used eye protection to make sure the epoxy didn't get on us. The MAS epoxy hardly has any odor so we just opened the basement windows and were fine. Here I'm wetting it out with the brush.

Here is the dry cloth draped over the hull. After the final sanding vacumed the entire basement and area well to try to get rid of all the dust. Then I did a final tack cloth over the hull.