Here are the rolls of tape ready to put into a yogert cup of epoxy. Laying the kayak on it's side works very well and I didn't have a problem sticking my head into each hatch. Here is the kayak taped with the inside completed. Next steps are to strip off the tape, clean off any glue, sand or plane the edge, add filler to any cracks and repeat the process on the outside. Now I'm getting anxious to go paddling.
Thursday, December 30, 2010
Joining the deck & hull
These pictures ended up in reverse order. Before joining the hull and deck I used a 30" sanding board with 50 course paper to level the sheerline on the hull and deck. This was recommended by Joe in the plans and works really well. Then I sealed the edges of the hull & deck with 2 coats of epoxy just in case anything is ever exposed. They fit together much easier than I expected when my son Ben and I taped them together. It was great to step back and finally see what looked like a kayak nearing completion.Here are the tools of the trade for joining them together. Small brush, brush on the end of a 4 fts stick and flashlight. I soaked the roll of 2" glass tape in epoxy and started it in the middle of the coaming and rolled them to each end. It really worked well expect on the first one where I didn't measure exactly how much I had on each end and ended up with to much on one side and to little on the other. I was able to simply bury the extra in the ends and add an extra roll on the other side. Live and learn.
Saturday, December 11, 2010
Hatches
As many before me have reflected, cutting two holes in a beautifully finished deck is somewhat of a daunting experience. The template from Redfish provided the exact dimensions of the cutout. I used masking tape to then go over the line and reline the masking tape. This prevents any splintering of the wood and keeps the cut clean. I used a 1/16" (or smaller) drill bit to make a few holes in order to get a cut started. If I could do this over again I would do it differently either with a Japanese bonsai saw or a Dremel - neither of which I have right now. However, once thru I used a fine tooth saber saw blade to widen the cut and then used saber saw with a fine tooth metal blade to make the cut.
I decided to follow the Redfish directions on the hatch stops and used cedar strips. This is a view from the bottom. It took about 90 1 1/2" strips on the rear hatch put down with thickened epoxy. It was a challenge to figure out how to clamp this down without it moving and I didn't do all that well. Ben advised me to used a sandbag, but, since I didn't have one I stuck with clamps and small strips. I found that once the epoxy was setting up was the best time to clamp it. These strips got cut from the other side to provide a 1/4" lip for the hatch to rest on. Then another set will be placed under these that will provide a resting strip for the neoprene weather stripping.
This is another view of the bottom of the hull with the hatch. The hatch has two sets of hooks that will connect to an under the deck bungie to provide tension from the bottom. These are made of mahogany and will be epoxyed. The little piece in the middle has a hole through it for the bungie and will provide a permanent hold to keep the hatch from falling overboard or in the sand on the beach. This type of hatch hold down keeps extra webbing and latches off of the deck.
Here is a view of the hatch in place from the top. It should be held down tight enough with the bungies from below and the neoprene weatherstripping to provide a good watertight seal. At least thats the plan. I will need to provide something to grab in order to open the hatch. Some use a little wooden ball on top, others a small piece of webbing. Not sure yet what I will do about that.
Monday, November 29, 2010
Completing the Coaming
The coaming has been a challenging and slow process. Here is a shot of the coaming lip epoxied on to the riser with the finished fillet underneath. The fillet is thicken epoxy mixed with sanding dust from the black walnut. This is actually the underside of the lip. Once this was hardened I needed to cut off what remained of the top of the riser and then sand the whole lip down to the correct width and shape.
Here is the lip sanded and ready for installation. Its installed by putting thickened epoxy on the edge of the cockpit recess and the riser and then using 3/4" block spacers to create the space between the deck and the bottom of the lip as seen below.
The finished lip installed with another fillet on the bottom. Now it gets well sanded again and glassed from the top of the lip, around the riser and down under. A double layer of glass on the rear 1/2 of the coaming will give it extra strength. The coaming has required me to practice extra patience but I am pleased how it is coming out. Will post the finished glassed coat soon. Can't wait to put on a spray skirt and try a roll....or at least a paddle
Monday, November 15, 2010
Creating the Coaming
The coaming is made of a piece of 3" black walnut that comes with the Redfish kit. The black walnut coaming will match the stems. Here it has already been cut to the taper of the cockpit recess. A line is scribed along the recess to prepare for the cutout.
I used a fine tootch metal saber saw blade to do the cutout. You cut it just on the inside of the line and then sand it to the point that the cockpit riser fits snugly into it.
Here is the riser in the cockpit recess read for the lip. The lip is made from about 12 wafer thin pieces of 1/2" black walnut. They are laminated together with thickened epoxy and clamped in place around the riser. The riser has been taped since this is just to give the lip its shape. It will get expoxed to the riser in a next step.
Saturday, November 6, 2010
Glassing the inside of deck & hull
The big brown from the Salmon Rive in Pulaski, NY has nothing to do with the kayak except that I had fun in October catching salmon, steelhead and thie beautiful brown trout instead of working on it. But I'm finally back with a goal to completing it by March 1. I am not in a rush and find joy in going slow. Especially since this is my sabbath project. The fact is I'm not sure what I'll do when I finish it. I may have to just start another.
After glassing the deck I was able to remove the deck and hull from each other quite easily. I was very surprised. This then left the job of sanding them both down well in preparation for glassing the interior. Since that is not very motivating or fun it took awhile to get to. However, finally I just "bit the dust" and got it done. Not with the exactness of the exterior but with enough smoothness for the glass to lay flat without air bubbles. (although there are a few).
I used spreader strips in the hull and deck to keep it from warping and spreading or shrinking. I realized that it will do this very quickly. These are cut to the dimenstion of the stations that were removed from these parts of the hull. For the deck I simply used scrap pieces of cedar strips and masking tape to maintain the right beam.
The glass laid out very well in the hull with no cuts necessary in the bow and just one small cut in the stern to get it to lay flat. Redfish provides 6 oz. glass cloth. I did install an extra strip on the inside as well as the outside in the bow and stern and an extra strip of cloth around the coming in the hull. Every piece adds strength but also weight. I want the bow, stern and coming to be very strong since they will take the most use and abuse however careful I think I will be.
Here is the hull with the interior completed. I used strips cut to exact widths to maintain the width of the beam when the epoxy was drying. This will make it easier later to put both halfs back together. The exterior beam of this kayak is 23 3/4 inches. The next step is glassing the inside of the hull and then working on the coming.
Monday, September 27, 2010
We finished the NCC
Well, we made it. Let me reflect a bit on our trip. First of all Dave and I are thankful for our wives Debra & Cheryl who give us the freedom to do crazy things like this and for their love & support. We left home Wednesday morning, Sept. 22 on our way to Greenville, NC to stay at the home of Charles Gaston & his mom. Charles is a former member and deacon at Madison Ave. and moved down to stay with him mom last year. We enjoyed their hosptality and seeing a bit of Greenville which is home to East Carolina University.
We arrived at Cedar Island by noon on Thursday with plenty of time to go through our gear check and captains meeting at 4:00 p.m. We camped in the Driftwood campground for the night and even took an evening paddle to scout out the coastline for our return and try to find the "cuts" from the back bay to the ocean.
Friday morning began with a beautiful sunrise. The race began at 7:30 a.m. on very quiet and flat water. This was great for the paddlers but meant that most of the sailboats had to paddle or row. Some rowed from 7:30 a.m. until 3:30 p.m. when the wind finally picked up on the Neuse River. The catamaran below sailed by "SewSew" aka Randy Smyth somehow caught just enough wind and took off and actually covered the entire 100 miles in 15 hours and 25 minutes. Amazing.
As we started off, we passed several pods of dolphins and throughout the day enjoyed the beauty of God's creation in the salt marsh, bays, islands, ospreys & egrets fishing, and sun shining. I even had a shrimp jump right in my kayak once. All I needed was a bit of cocktail sauce. We were challenged with paddling into a headwind and pushing ourselves to the limits of our endurance. We learned to stop and rest, eat and drink as much as we needed to continue on.
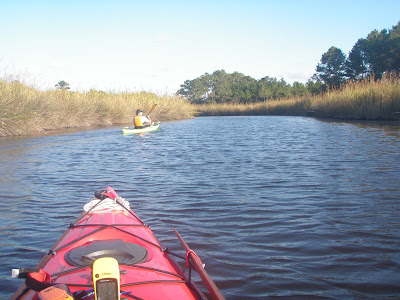
Here we are joyfully paddling up what we thought was "Clubfoot Creek". Somehow when we started and I reset the trip computer on my GPS, I erased all of my waypoints and route. I wasn't too concerned about this since we also had charts and Dave had put the waypoint of Clubfoot Creek in his GPS. However without his glasses he doesn't see too well and so what I erased, he misread and we paddled on. I called Ben (our shore contact) to excitedly tell him he could file a report for us that we were in Clubfoot Creek and then turned my phone back off to save the battery. After paddling for a mile or two - it was a beautiful cyprus swamp - we began to wonder how the sailboats were going to make it through, then we began to wonder how we were going to make it through. At that point I called Ben again to receive the news that we were not in Clubfoot Creek but that it was 3 miles further up the Neuse River. Big letdown...and the sun was going down fast as well. We paddled back out and 3 miles further as the sun set and we finally entered the real Clubfoot Creek which was more like a huge river than a creek. We passed our first sailboat as they were rowing and for the next several hours passed most of the other sailboats. Crazy Russian from Staten Island and Dog Paddler from Long Island were not happy about rowing or paddling for most of the day. But they all pressed on. When we finally reached the Harlow Canal, the tide was against us, but we still did better than the sailboats paddling against it. We finally reached the Newport River around midnight and found a place to camp at 12:30 a.m. Saturday morning. As we pulled up we realized that someone else was already camped there but were too tired to do anything but stop. We woke up SeaHawk aka Craig Smith who had been sleeping a few hours and he welcomed us. Once the sailboats reached the wind, they sailed on through the night.
We slept from 1 am to 6 am and were back on the water by 7 am headed for the checkpoint in Beaufort. Here's Dave standing in the salt marsh where we stashed our kayaks for the night and slept just above it on a grassy road above an old boat slip. This is part of "stealth" camping to leave no trace and stay on the down low.
We checked in in Beaufort around 9:00 a.m. and after some coffee, oatmeal and more power bars continued down Taylor Creek. We had the tide right and with little effort were able to move at 4-5 mph for that stretch. Across this creek - which is more like a big channel - is the Rachel Carson Preserve. Rachel Carson wrote Silent Spring in 1962 that is often credited with helping to launch the environmental movement in our country. On the preserve wild horses grace peacefully and people are the guests. We took the outside route around Harkers Island which put us in a lot of wind and surfing the waves. Fun, but challenging. We made it to Brown's Island for lunch and a rest for the final push north along Core Sound. When I was planning the route, I thought it might be nice to paddle across Core Sound to camp on the beach by the ocean. In reality a 2 mile paddle across the wind tossed sound was the last thing we would do. At this point we just wanted to keep going toward the finish the shortest way possible.
Saturday afternoon we had a south and southwest wind mostly at our back but also creating 2-3 foot waves. I kept getting better at surfing them but also kept getting blown sideways in which case they crashed over you and hopefully the skirt kept out most of the water. In theory at least. By 8:00 pm. we were out of light and not comfortable continuing in the dark in those waves. Dave spotted a trailer campground and we pulled into their slip, paid our fee, cooked dinner and went to sleep early. We got up at 5:00 am. and were on the water by 6 am. with about 12 miles to go. Here is the Sunday morning Sunrise as I worshiped the Lord singing "Praise to the Lord, the Almighty the King of Creation. Oh my soul praise him for he is my strengh and salvation.
We plotted our course to take the shortest route to cut through to the finish line only to get up up to the end of the channel and realize it was the wrong one. There was about 50 yards of beach between us and the ocean. On our track if you zoom in you can see our little portage to make it through. We were welcomed back on the water by a few Watertribe folk sailing & paddling and a welcoming party of 20 on the beach. We came in last but as I reminded Dave... Jesus said "the last shall be first." :) Lessons learned....Our character is developed by persevering in the midst of difficulty and struggles. When you feel like you can't go on, stop and rest, get something to eat, sleep and start over on a new day. It was striking that at the captains meeting they reminded everyone to do this before they quit. When Elijah was ready to quit as a prophet of Israel, running away from Queen Jezebel who was trying to kill him. The Lord sent him an angel in the desert to feed him and tell him to sleep. It was only after that he could go on. In ministry as well as life God created all of us to Work, Rest and Play. If we get those out of balance our life will be out of balance. This race was my play.
Map of our entire route (for a larger version, click HERE)
Monday, September 20, 2010
Watertribe North Carolina Challenge
Yes, I think we are ready to paddle. Tent, sleeping bag, air matress, paddling clothes, camp clothes, bad weather clothes, cooking stuff, safety stuff - flares, radio, gps, SPOT, cell phone, spare paddle, etc. And of course a fishing pole & some lures.Today I tried to see if it all fit and it did so I think we're ready to go. David Lyle and I will leave Paterson on Wednesday morning, stay Wednesday night at the home of one of our former deacons, Charles Gaston in Greenville NC. Thursday morning we will go out to Cedar Island in preparation for the inspection in the afternoon and captains meeting at 6:00 p.m. We will be camping overnight at the Driftwood Campground right at the start and begin at 7:30 a.m. Friday morning. There is a detail schedule and narrative of the race on the Watertribe website. Below is a copy of the map that shows the course of the race. You can track me in two ways. You can go directly to the SPOT tracking site (just click on SPOT). Here I will be called Macatawa, which is Ben's paddling name, since I'm using his SPOT - but its really me. Or you can go to the Watertribe Map site - click HERE.
At this site you will see all of the paddlers. My name is PassaicPaddler. If you want to just see just me click on that name in the 3rd box and hit "regenerate view". David Lyle is Summit Paddler.
For all of those who are supporting me to help raise money to purchase kayaks,vests, paddles and a trailer for our Christian Cadet Club, I'm happy to report that I have surpassed my goal with pledges of $55.00 per mile. This will be enough to also purchase new camping and fishing equipement for our new cadet group. Thanks so much to all who made a pledge. Please keep us in your prayers.
Saturday, September 18, 2010
Glassing the Deck
Heres the deck after the 3rd coat of exoxy. I felt much more comfortable doing it the second time around. The first coat adheres the cloth to the wood. Second coat fills the weave and third coat just tops it off. This coat will eventually be sanded smooth in preparation for 4 final coats of spar varnich.
Here is my friend Lou mixing the epoxy. For the first coat I found its very helpful to have Lou mix while I apply. After about 1/2 hour I could begin squeeging the excess off.
I'm very pleased how the cockpit recess came out. This will eventually be cut out to make way for the cockpit which is black walnut. the color contrasts are beautiful I think.
Here I am installing the first coat of epoxy. It always amazes me how the cloth totally disappears and become like glass once the epoxy is applied. Note the gloves, long sleves and safety glasses. We felt no need for resperators since we had the basement windows open and there seemed to be no fumes.
Monday, September 6, 2010
Urban Paddling
Yesterday afternoon Richard Narrmore, a fellow New City Kid's Church board member, and I set out to paddle from Liberty State Park to Laurel Hill Park in Secaucus. The route I planned showed just over 17 miles. We had an incoming tide and hoped that would help us get up the Hackensack River before it got to dark. Unfortunately I overestimated how fast and how far we could paddle and by 7:30 the sun set and we still had over 5 miles to go. By 8 p.m. we had lost light and the ingoing tide turned fast to outgoing. The last 3 miles againt a growing outgoing tide were not fun. We pulled off the water at 10:00 p.m. Thanks to Richard for renewed energy through his Liver Dumplings.....you should try one sometime. Lessons learned. Don't be unrealistic....Why do I have to keep learning that. Keep ready communication between each other. Once we lost each other in the dark (even with our lights on) and even our whistles didn't help alot since I couldn't tell what direction it was coming from. Other than that it was a great trip.
Here is Richard going under the Bayonne Bridge. Construction on the bridge began in 1928, and eventually cost $13 million. When it opened on November 15, 1931, it was the longest steel arch bridge in the world and was deliberately built a few feet longer than the Sydney Harbour Bridge, The same pair of golden shears used to cut the ribbon for the Bayonne Bridge was sent to Australia for the ribbon cutting of the Sydney Harbour Bridge. In the next few years they are going to have to rebuild or build a new bridge to accomidate the new giant freighters from China that will be 60 ft. higher. The future life of the Newark Harbor now depends on raising the height of this bridge.
Here we are approaching the lighthouse in the New York Harbor at the entrance to the Newark Harbor with the Verazano Narrows Bridge in the Background. We had high westerly winds crossing the bay from Liberty State Park.
911 Memorial in Bayonne. Standing more than 100 feet tall, “To the Struggle Against World Terrorism” honors victims of 9/11 and the 1993 World Trade Center bombings and serves a symbol of solidarity in the fight against world terrorism. Created by Russian sculptor Zurab Tsereteli, the memorial was a gift from the Russian people. It resembles a giant teardrop.
Saturday, August 28, 2010
Map of Sandy Hook paddle trip
This is John's son Ben. I am helping my dad out with some cool GPS mapping capability I discovered. Here is a GPS track of his recent Sandy Hook paddle trip:
Saturday, August 21, 2010
Building & Paddling
With the summer here I have been enjoying some wonderful paddling. Last Saturday I watched the sun come up over the ocean from Hull, MA along the south shore of Boston. I took my parents up to visit my brother Robert and his family and began the day with a 2 hour paddle through the islands on the outshirts of the Boston harbor. This past Thursday my friend David Lyle and I paddled 20 miles around Sandy Hook which is part of Gateway National Recreation area at the beginning of the "beaches" of NJ. It was good practice for the North Carolina Challenge coming up in just over a month where we will have to do that x 5 over 2 1/2 days. I think we are ready. Back home I've been working on the cockpit recess of the "Spring Run". It seems like it takes forever since there are about 120 stips that go into it and I can only glue 4 at a time. At least I haven't figured out how to do more and do it well.
After this is completed the entire deck will be sanded and glassed. Then I install the cockpit. After that it comes off the hull in order to work on the bottom of the deck and inside of the hull.
While I've been waiting for glue to dry I began work on a Greenland Paddle. I've found helpful directions at Johns Kayak Projects (not me) These are the plans from Chuck Holst. This has been both challening and rewarding. I began with an 8 ft. piece of clear cedar. Cost is about $16 from Kuiken Lumber. I didn't use their cutting method but used a circular saw to make the initial cuts...a band saw would be much better. Then I used a course paper on the belt sander to take it down and finished with 50, 80, 100, 120, 180 grit paper. I was going to just Tung Oil it but I'm concerned that the blades are a bit fragile and might chip so I'm going to glass edges and epoxy the paddle. The weight was supposed to be 30 ounces for and 87" paddle. Mine is 92" but I exceed the 32 ounces of my postal scale. I think I'll live with the weight whatever it is. Overall I'm quite pleased with how it has come out. May sand it a little more before finishing.
Saturday, August 7, 2010
Teaching the grandkids to kayak
Saturday, July 24, 2010
Finishing the Deck
Here is the finished deck taken from the bow. I'm very pleased with how the final strips went in. I ended up cutting long miters but the Japanese saw worked well. Can't wait to see the color contrasts with the dark walnut cockpit on top that will match the stems.
Here is a view from the cockpit to the stern.
Last pieces clamped in place.
Template for the Cockpit recess. This is a contrast transition piece that levels the deck to the cockpit.
Top view of the cockpit recess cut out. Now I need to refill it beginning from the front and back. I don't have to fill it completely but around the edges enough to where the cockpit will meet it.
I'm going to use the medium brown cedar that you see on the bottom edge of the recess for the filling. Thats all for awhile. It's off to the East Branch of the Delaware for some swimming, kayaking, canoeing and lots of fishing for smallmouth, walleye and trout in the West Branch. We're excited that Ben, Emily, Sara and David will be coming up for the week to join us.
Subscribe to:
Posts (Atom)