Saturday, December 17, 2011
Planking
I've been making good progress planking the hull and pleased how it is coming out. I've been using a variety of techniques to install the strips without staples. Here you can see that I'm planing up the hull toward the bottom and the top at the same time. I shave the stem as I go to match the angle to each strip as it is installed.
Here is a jig that was recommended by Ted Moores in Canoecraft & Kayakcraft. Its basically a 31/2 x 51/2 piece of plywood with a 3/4 inch notch cut out. It can handle 3 strips at a time but I'm only using one. I'm using it to put pressure on the temporary short cedar strip that I have stapled in above the strip being installed. It also provides pressure, along with a shim, on keeping the strip close to the station. It works very well.
Monday, December 5, 2011
Stems, Sheer & Strips
Shaping the stems is definitely, as someone put it " a bugger of a job". I used a small block plane, spokeshave and surform to begin the shaping. I also used a caliper to maintain a 1/8" edge.
My father came by this morning with Mr. John DeVries - a Master Carpenter as well as choir director - from the Holland Home to give me some lessons in using a spokeshave & plane. The big lesson was to keep them sharp. While I considered frequent sharpeing once a year or so Mr. DeVries informed me that I might have to shapen it every few hours - especially since there was epoxy in the stems. I purchased a Stanley sharpening kit and now know how to do it. Another lesson learned. I was also trying to shave way to much at one time. The key it to just get a little slice.
Setting the sheer strip is one of the most important steps in building. Beginning with the center station it runs outward parallel to the water line. When I did the kayak I put the bead side up but with this I put the cove up. This makes it much easier to lay in the glue. The sheer must be "fair". This means that it follows as gentle line without being forced out of shape.
Once the first sheer strip is put in place the second one needs to match it. The way to do this is by leveling across between each station. This is another reason why it was so important to get the strongback level every which way. It all went quite well and I was excited to get started installing the strips after all the preparation work.
Now I have to decide what pattern I will create in this canoe. I have a variety of shades of red cedar from quite light to fairly dark. I wish I had a few strips of Alaskian White Cedar or or Black Walnet but I'm not confident enough to cut and route my own so I'll work with what I have.
My father came by this morning with Mr. John DeVries - a Master Carpenter as well as choir director - from the Holland Home to give me some lessons in using a spokeshave & plane. The big lesson was to keep them sharp. While I considered frequent sharpeing once a year or so Mr. DeVries informed me that I might have to shapen it every few hours - especially since there was epoxy in the stems. I purchased a Stanley sharpening kit and now know how to do it. Another lesson learned. I was also trying to shave way to much at one time. The key it to just get a little slice.
Noah's ships their cedar strips with each board that was cut wrapped together in 7 strips. I have 9 bundles of 7 strips so as I unwrapped them I labeled each with a number from 1 -9. This will enable me to put strips on opposite sides and create a balance. I'm still trying to figure out what kind of a pattern I will create. Wait and see.
I have chosen to build this canoe without staples in the strips. When I built the "Spring Run" I used staples in the hull and did the deck withouth. It takes a bit more time but I find its well worth it to avoid all those staple holes. There are several different methods to go "stapleless" depending on how fast you want to work. Since I usually only do one strip at a time on each side I have developed my own method. I have a load of 3" strips that are beaded & unbeaded. As I install the cedar strip I install a short piece above it and staple that. Then I use masking tape to pull all the strips tight together and put two unbeaded strips on each side of what was glued with a squeez clamp to hold it fast. I find that each strip takes me about 30 minutes which is fine with me. So, I actually am using staples but not putting them in the strips of the canoe.
Here are the first 3 stripss installed. You can see the little glue syringe that they sent with the kit. One fill with glue does about 1 strip on 1 side. It really works great. In order to keep the strips parallel to the waterline I will also be installing strips in the bow and stern on the bottom (or top depending how you look at it) of the sheer to fill in that section. Its very exciting to see the canoe taking shape. At this rate I don't think I'll have any trouble finishing it to auction off atPaterson Habitat's annual dinner in April
Monday, November 28, 2011
Mounting the Station Forms
Building a cedar strip canoe is similar to painting in that there seems to be as much work preparing to paint as painting. Here too its all in the preparation of the mold that I will build on.
Once the inner and outer stems are made I could mount the stem mold on the strongback. This involves alot of leveling every way possible and making sure everything is plumb and straight.
Here is the completed bow station that is screwed to station mold #6. In addition it is supported at the strongback and two wedges are placed to keep it square. It is very important that these be just right since everything else lines up to the bow and stern.
Here is a string line from the center of the bow and sten across the length of the stronback. This is done with a little building jig that is 1/2 the width of the plywood used for he bow and stern - in other word 5/16". The line provides a top center line to match the centerline scribed on the strongback.
Each station mold is lined up with the center line on the strongback and the centerline of the string. In addition there is a vertical center line on each station mold that must be plumb. You simple adjust or shim the bottom if needed, clamp it to the strips on the strongback and use two course thread drywall screws to attach it. It worked very well. Here are the stations going into place
Once all the stations are attached I covered each with a strip of masking tape to keep the glue from sticking. Then I used a spare cedar strip down the stern, leveled each station form and tacked them to this battan to hold them in place. Unfortunately I did this before I read the insructions to make sure everything was "fair" and as I sighted down the lines I realizd that the one #2 station was just a fraction higher than the #1 station......and that is not a good thing. So..off comes the battan and masking tape and out comes the "surform" to shave off a bit. It all looks good now. The inner stem is clamped in place in order to shave it down as it is shaped to received the cedar strips. Next step is shaping the stems and sorting the cedar strips to decide my pattern. 
Once the inner and outer stems are made I could mount the stem mold on the strongback. This involves alot of leveling every way possible and making sure everything is plumb and straight.
Saturday, November 26, 2011
Making the Stems
The stems form the bow and the stern of the Canoe. There is an inner stem that you never see again since it is covered with cedar strips and an outer stem that is the final finish of the bow and stern. These stems are made from ash ripped 1/4"x 3/4" so they will bend easier. Each inner and outer stem is 3 pieces or the equivalent to a 3/4"x 3/4" solid piece. The steamer I create was to fit the fryer/steam that I had. Made from a 9" cake pan, plywood and a piece of 2" PVC screwed and epoxied to it.
Now we're cooking. If you look close you can see the steam. It takes only about 15 minutes in here to get the wood fibers soft enough to bend around the stems. Once you pull them out - with gloves by the way- you have about 1 minute to get them clamped before they cool off.
Here they are clamped around the stem form. This step is done before the form is mounted on the strongback so you can let it fly at the ends. Once the stems are epoxyed the ends can be trimmed to size and the stem forms mounted on the strongback. ts a good thing Home Depot had a sale on the 6" squeese clamps or I would have been in trouble. As it was they worked great. You only need to clamp every other hole for this step.
The steamed stems are left to dry overnight on the forms and then once removed given some more air time to be completely dry. I hung them over our furnace where they got lots of warm air.
After about 24 hours or so the stems are epoxied together with thickened epoxy. It is important to keep the inner and outer stem from being glued together - thats what the blue painting tape is for.
I used every clamp I had for the final clamping to the stems. 22 in all and I'm afraid I'm going to need more in the future. ps. gift idea. The clamps are set alternately on the inside and outside to balance the pressure but pulled the stems very tight to the stem mold. I cleaned up the extra epoxy with a painting scraper and a rag with Laquer Thinner. Now they will sit for a day before being removed and shaped. The next step will be to mount the stem molds and the rest of the station molds
Monday, November 21, 2011
Making the Station Forms
Today was my Sabbath Day of rest and I spent it cutting out the Station forms for the Huron Cruiser. I began with two sheets of 5/8" plywood cut in 1/2 ( you can do it for free at Home Depot). The factory ends become the bottom that will meet the strongback. I had to order large size carbon paper on-line to trace the from on to the board and on to the back of the plans. A good idea I just picked up off of the Bear Mt. Boats builder forum was to have a mirror image of the plan duplicated at a blueprint printer and attach it at the centerline. This would eliminate one step. The whole process is timeconsuming in a relaxing way but not difficult. You just have to be very exact on the centerlines, tracings and cutting.
I drilled the holes for claiming the stems to the stem station with a 2" bit. The plan called for even more holes than this but the book said 3" on center was sufficient so I went with that.
Saturday, November 12, 2011
Building the "Huron Cruiser"
"The lines for this canoe were taken from an original 'Huron' built in cedar/canvas by the Peterborough Canoe Company. It was a second grade model in a series of Cruiser canoes that measured from 16'x33" to 18'x37". "They have good carrying capacity while retaining a light draft, and are an easy paddling craft that can be handled well in rough or swift waters. The gunwale line is straighter in these models and is lowered at bow and stem, thus offering less wind resistance." The rounded bottom shape may reduce carrying capacity but the paddler may expect a quick and responsive craft." ...from the 1929 Peterborough Canoe Co. catalogue.
Here is the strongback ready to go with most of the blocks attached. The next step will be to transfer the exact station mold shapes from the plan to 5/8" in plywood, cut them all out with a jigsaw and sand them all down to the perfect shape. Any mistakes at this staged will lead to a misshapen canoe. For any potential boatbuilders interested in seeing the entire process actor Nick Offerman recently built a Bear Mountain Canoe and did a video of the entire process. This is
For any potential boatbuilders interested in seeing the entire process actor Nick Offerman recently built a Bear Mountain Canoe and did a video of the entire process. This is available for purchase but he also did a 300 page journal of the construction that is available for free by clicking HERE.
Monday, October 3, 2011
North Carolina Challenge
We were fortunate to be able to take cover in a shed and continue on to Phillips Island where we spent the night. We arrived just after midnight and slept until 6 am. when we broke camp and caught the wind across to Beaufort and the first checkpoint. "Scareman", the checkpoint host had prepared hot water for us to make coffee which was great. A cold front had blown in during the night and the temperature had dropped.
When we left Beaufort we caught the tide out of Taylor creed and the wind and had our sails up for the next 30 miles. It was an amazing day of sailing up the Core Sound with the west wind pushing us along at 4 -5 mph ( along with some paddling). See the video below. When we finally got to the Back Bay and the last 5 miles there was a 20 knot wind in our face. It was a tough paddle but we couldn't complain after such an amazing day.
When we got to the cut from the back bay into the Core Sound some of the wild horses of Cedar Island were wading along the shore. We hit the sound with breaking waves and made for the finish line. We concluded with a breakfast buffett banquet Sunday morning and awards ceremony. We rejoiced that everyone returned safely. The 1st place kayaker was GhostYak with a time of 20 hours 16 minutes. There were about 40 boats that raced with 11 that did not finish for a variety of reason. Here's the Watertribe gang for a final picture.
Ben produced a short Youtube video of the trip that you can see by clicking on NCC2011
Saturday, September 24, 2011
Watertribe North Carolina Challenge
1. Go directly to my SPOT Tracking Page. Just click on whats highlighted and it will take you to
it. Here you will only see my progess. If you look before Friday morning all you will see is
when I tested the SPOT in the church parking lot.
2. You can go to the Watertribe home page. Click on the box that says TRACKING MAP. Here
you can see every boat or just me My Watertribe paddling name is "Passaic Paddler" so you
can search for just me or move your mouse across the boats on the map to find me. Ben's
paddling name is Macatawa If you do a specific search you have to regenerate the page.
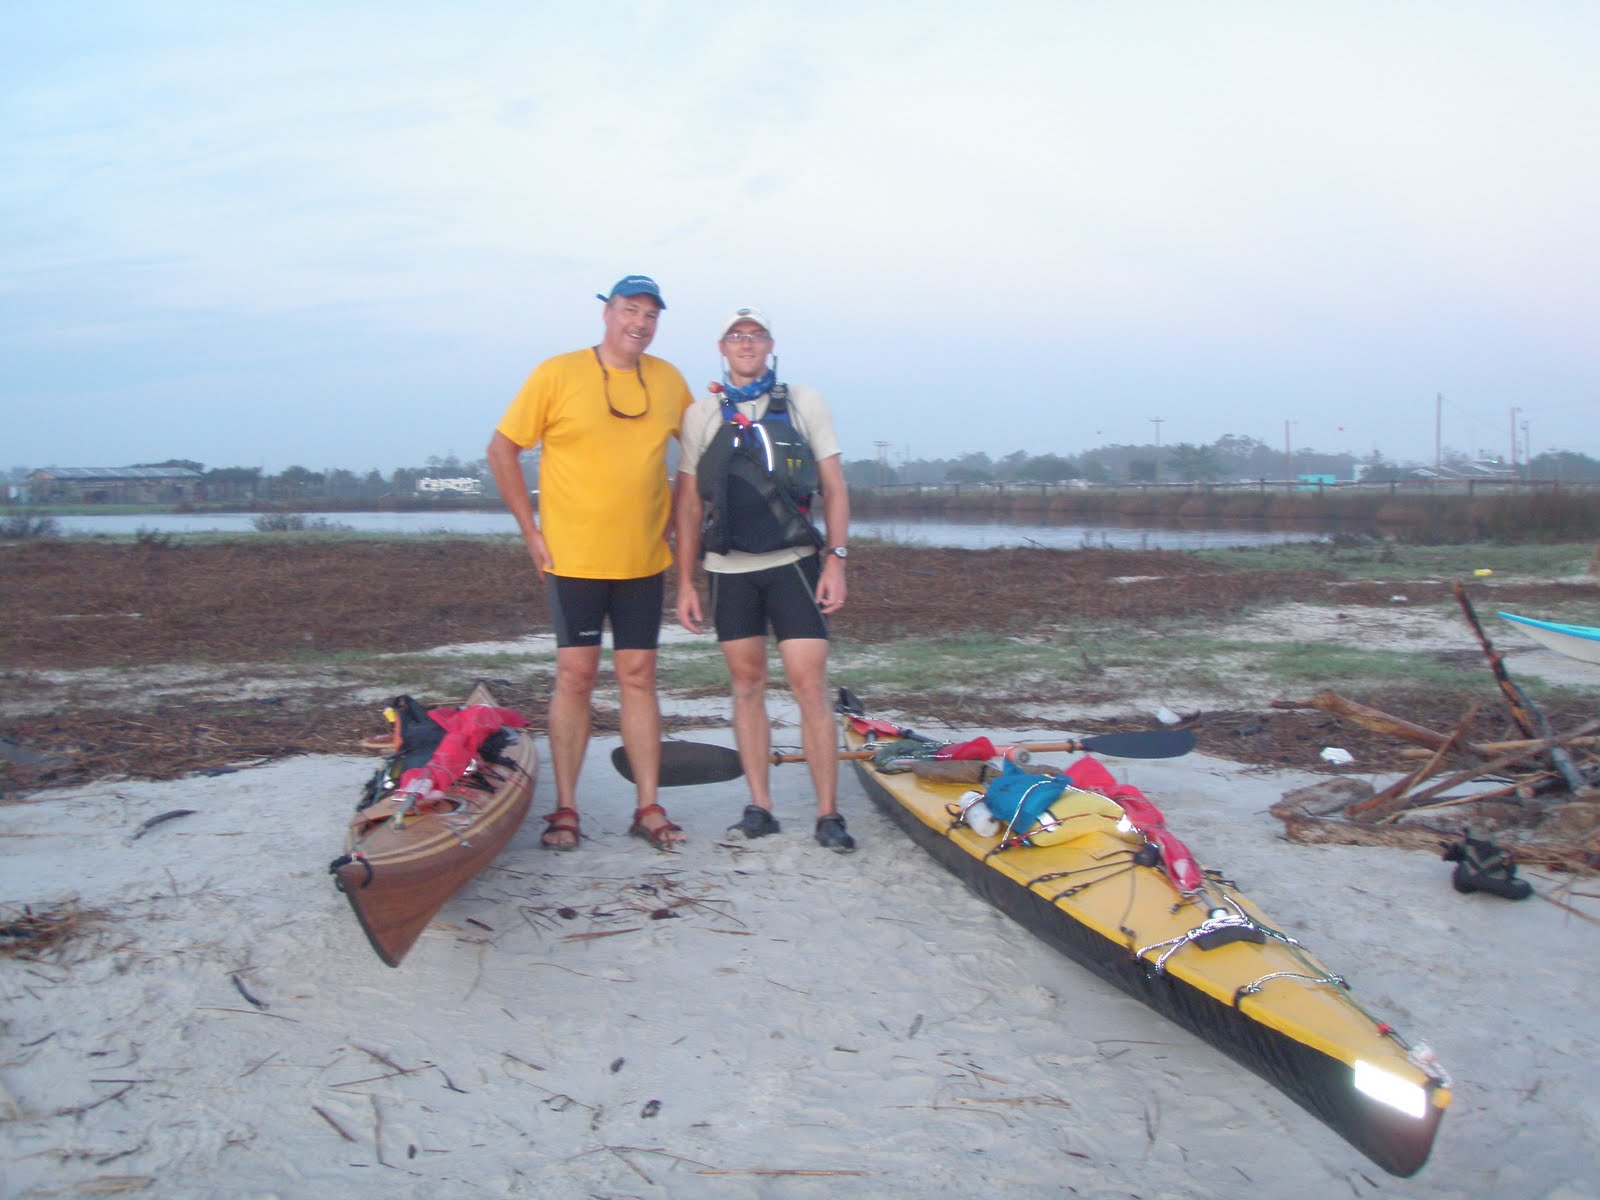
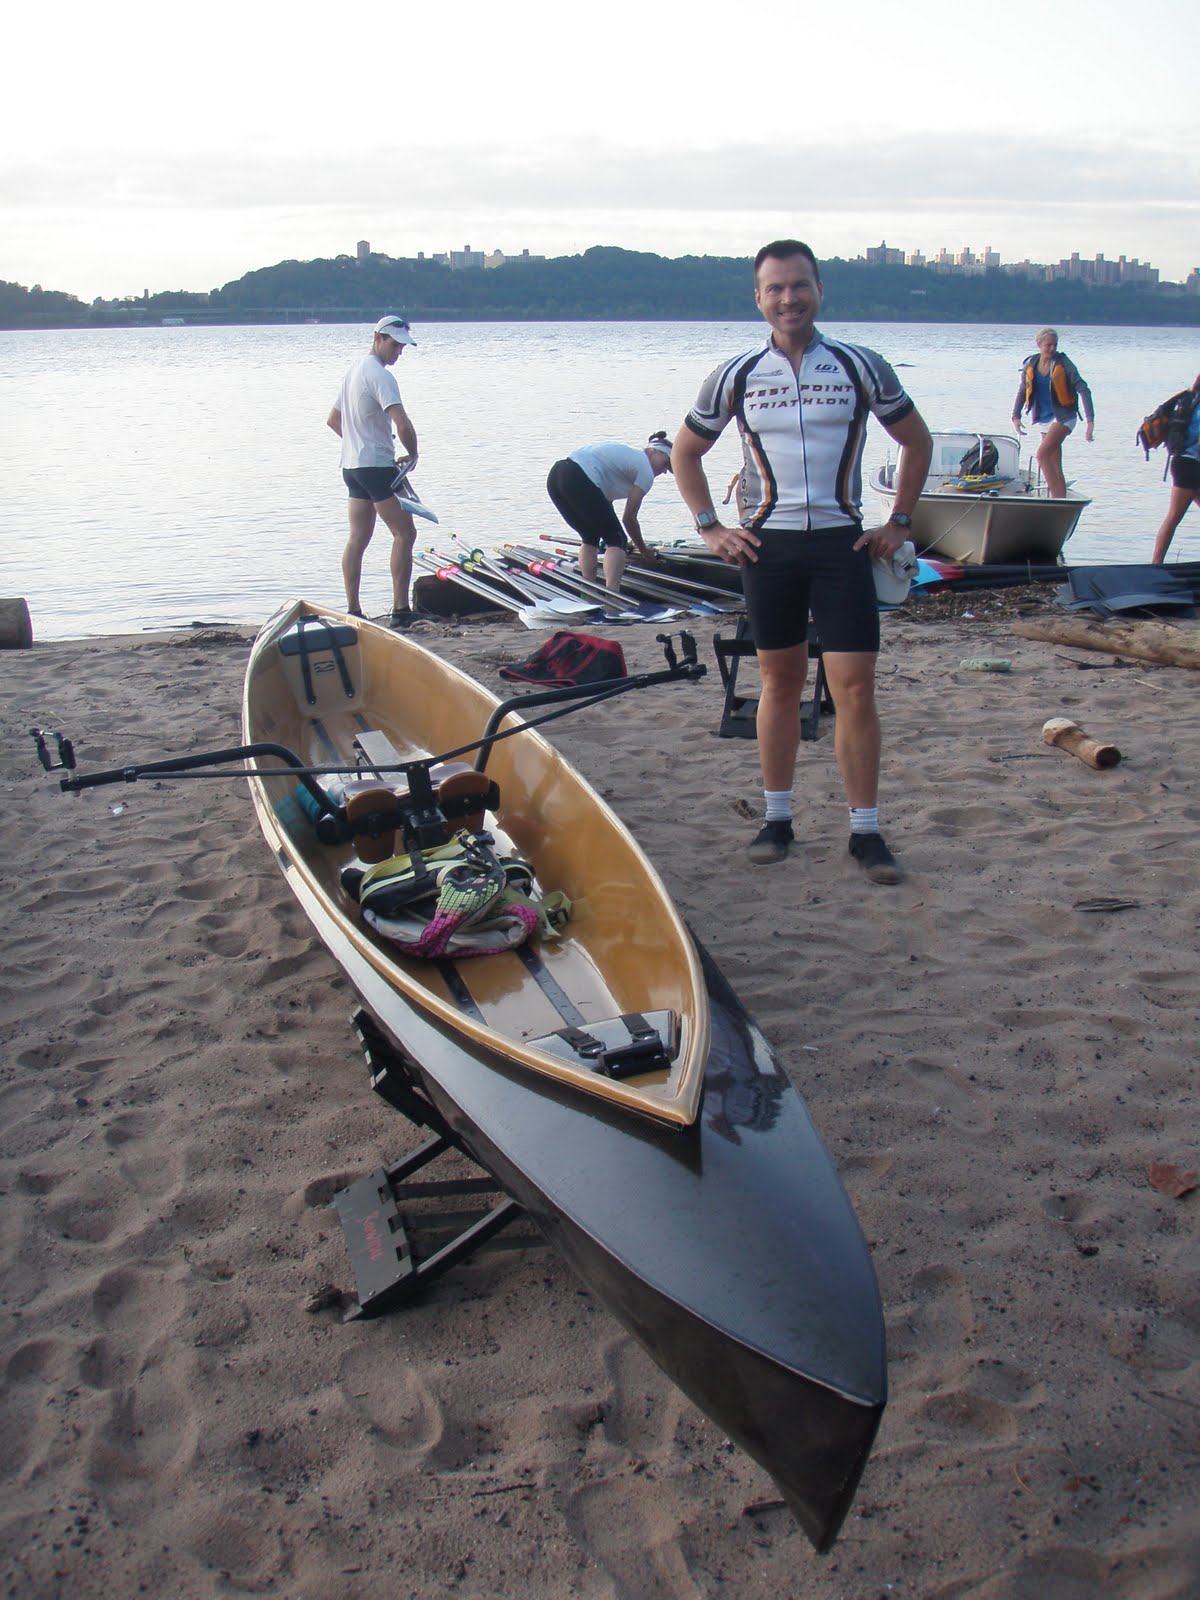
Saturday, September 10, 2011
Third Annual 25k Hudson River Challenge
Friday, August 26, 2011
River of God Kayak Kamp Day 5
Thursday, August 25, 2011
River of God Kayak Kamp Day 4
Wednesday, August 24, 2011
River of God Kayak Kamp Dav 3
God will help her at break of day. Pastor John talked about how God created rivers to provide us with water (we drink the Passaic River, water for the earth, transportation and in Paterson the river provided the energy to power the factories. Paterson is where it is because of the Great Falls. The Passaic River brought joy and work to the city of Paterson. Today it can still bring beauty and re-creation. After devotions we visited DeJong Iron Works to meet the Mr. Jerry DeJong and their crew who custom built our kayak trailer for us. We thanked them again for a great trailer that can carry at least 11 kayaks.
Here we are approcahing the Broadway/ Rt. 4 Bridge.
Here are a few short videos to see us in acion.
Subscribe to:
Posts (Atom)